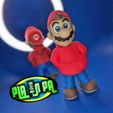
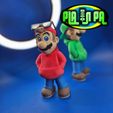
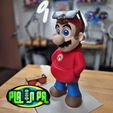
Design is to be printed out in separate parts in the corresponding colors to eliminate the need to paint. This also allows everyone to be able to print this design regardless of what printer you are using.
"Iet’s a go!"
I am so excited to offer this design today, March 10th, aka Mario Day!!.
I really wanted to give him sunglasses, so I experimented with different designs. His wider face and nose made designing a good-looking pair of sunglasses difficult. So, I am including the three different versions of sunglasses I came up with in the original scale, but I highly recommend V3.
The original size is about 192mm tall, or a little over 7.5 inches when assembled. I do not recommend scaling this down, as the details in his eyes will not print out without switching from a 0.4 to 0.2mm nozzle.
Of course, I created a larger version, scaling it up as big as I figured it would fit on my Bambu build plate. At 220%, I added an “M” logo on his shirt and adjusted the clearances between the parts. Fully assembled, the 220 version stands 424mm or a little over 16.7 inches.
Printing…
I completed all the test prints in the small and 220 versions without support. All Parts will load into your slicer as intended, and printing should be fairly simple for these versions.
I absolutely love printing on my BIQU CryoGrip build plates ( very similar to Sliceworx build plate) and highly recommend them, but for the lenses in the sunglasses, I would suggest printing them on a much smoother, shinier build plate, much like the IdeaFormer PEW PES Build Plate that has like a rainbow effect.
Assembly…
It should be fairly simple. Dry-fit everything in place before adding glue.
I highly recommend PLA Gloop, if you can get your hands on it.
PLA Gloop Website
Starbond Adhesives make a good CA or super glue alternative at a lower price point. I recommend the Medium or Thick formula. I would defiantly pick up some Accelerator if your planning on using the Thick formula.
Assembly was relatively simple on this design, and there wasn’t too much to add here. I kept adjusting the eyes and the clearances in these pieces but couldn’t get the eyepieces to just fall into place. A small amount of force should be enough to press the blue eye part in place and then press the black eye part into the white eye piece.
Everything else should be self-explanatory once all the pieces are printed out.
Suggested Filaments
I used 2 different skin tones to print the smaller ones. I do like the Bambu Matte Latte slightly more than Duramic Matte Skin. The Bambu Matte latte is a shade darker.
As seen in the one picture, I also experimented with three different shades of red PLA for this design. It may be hard to tell, but the larger 220 versions in the pictures were all printed with Duramic Rouge Red. I prefer that shade of red more than the other two I have tried.
Bambu Matte Latte PLA or Duramic Matte Skin PLA
Duramic Rouge Red
Bambu Cobalt blue Basic PLA
Bambu Matte Dark Brown
Bambu Matte Black PLA
Bambu Matte White PLA
Happy Printing, and Enjoy!!
You can follow me on Instagram, https://www.instagram.com/pla.n.pa/
to find out what I designs I am currently working on
If you’re interested in selling prints of my designs, become a Patreon supporter here…
https://patreon.com/planpa3d
Thanks for checking out my design.


/https://fbi.cults3d.com/uploaders/16675644/illustration-file/dc020048-572f-4d2b-a221-13c117ed32ce/stash-pot-main.jpg)
/https://fbi.cults3d.com/uploaders/16675644/illustration-file/158c189e-d70b-415e-9bc6-074a88c71ee7/king-side.jpg)
/https://fbi.cults3d.com/uploaders/16675644/illustration-file/ffcc39f6-8974-4349-be67-076611633fa9/CultsSwitch-Container.jpg)
/https://fbi.cults3d.com/uploaders/16675644/illustration-file/c35c70ce-b871-46fb-86a0-bb7836c9da27/20220422_162228.jpg)
/https://fbi.cults3d.com/uploaders/16675644/illustration-file/6f92eee4-da9d-4127-9352-0a35cc2656a4/Plant-famly.jpg)
/https://fbi.cults3d.com/uploaders/16675644/illustration-file/13e587c4-cd73-4070-a8a0-1c4f2a5cb496/20220909_132506.jpg)
/https://fbi.cults3d.com/uploaders/16675644/illustration-file/307977f6-78c8-49e9-b4f0-f57ff15c5378/Front-Face.jpg)
/https://fbi.cults3d.com/uploaders/16675644/illustration-file/66fb990f-b9b2-4fbd-a238-7dca166156d5/cover.jpg)